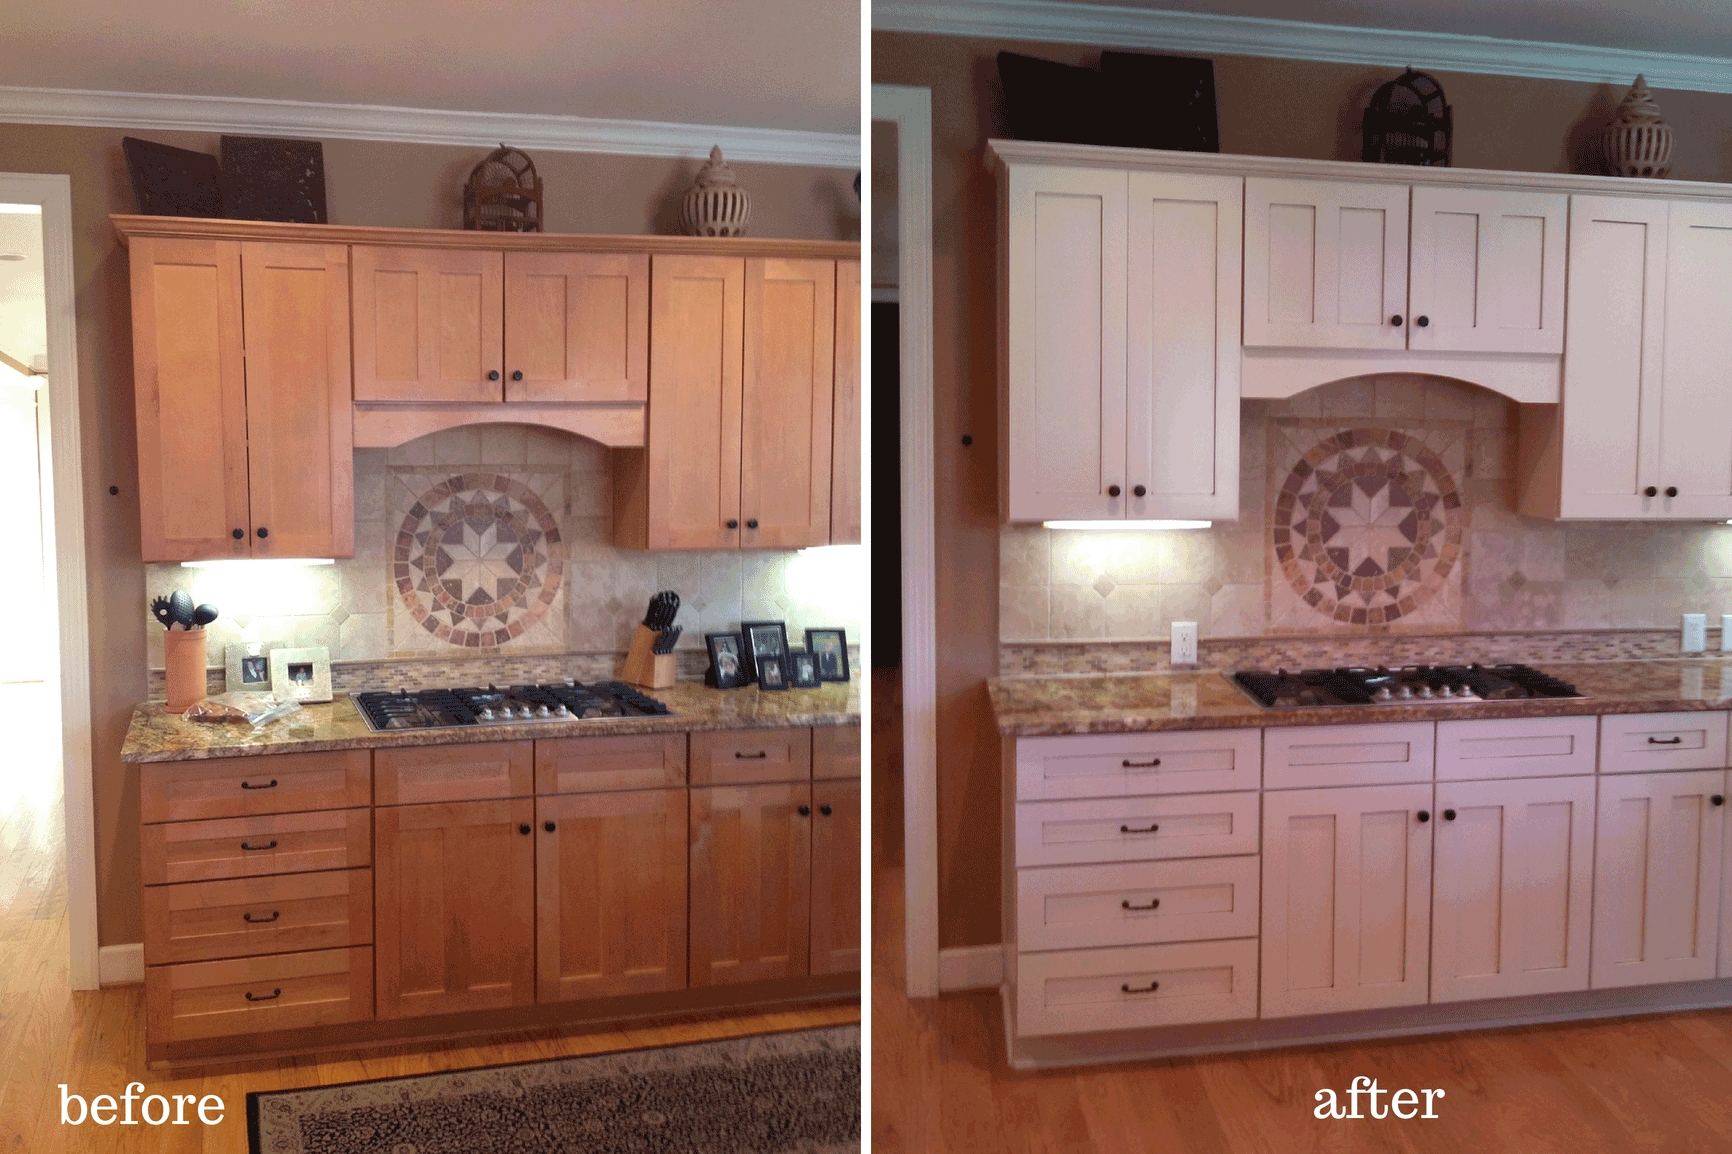
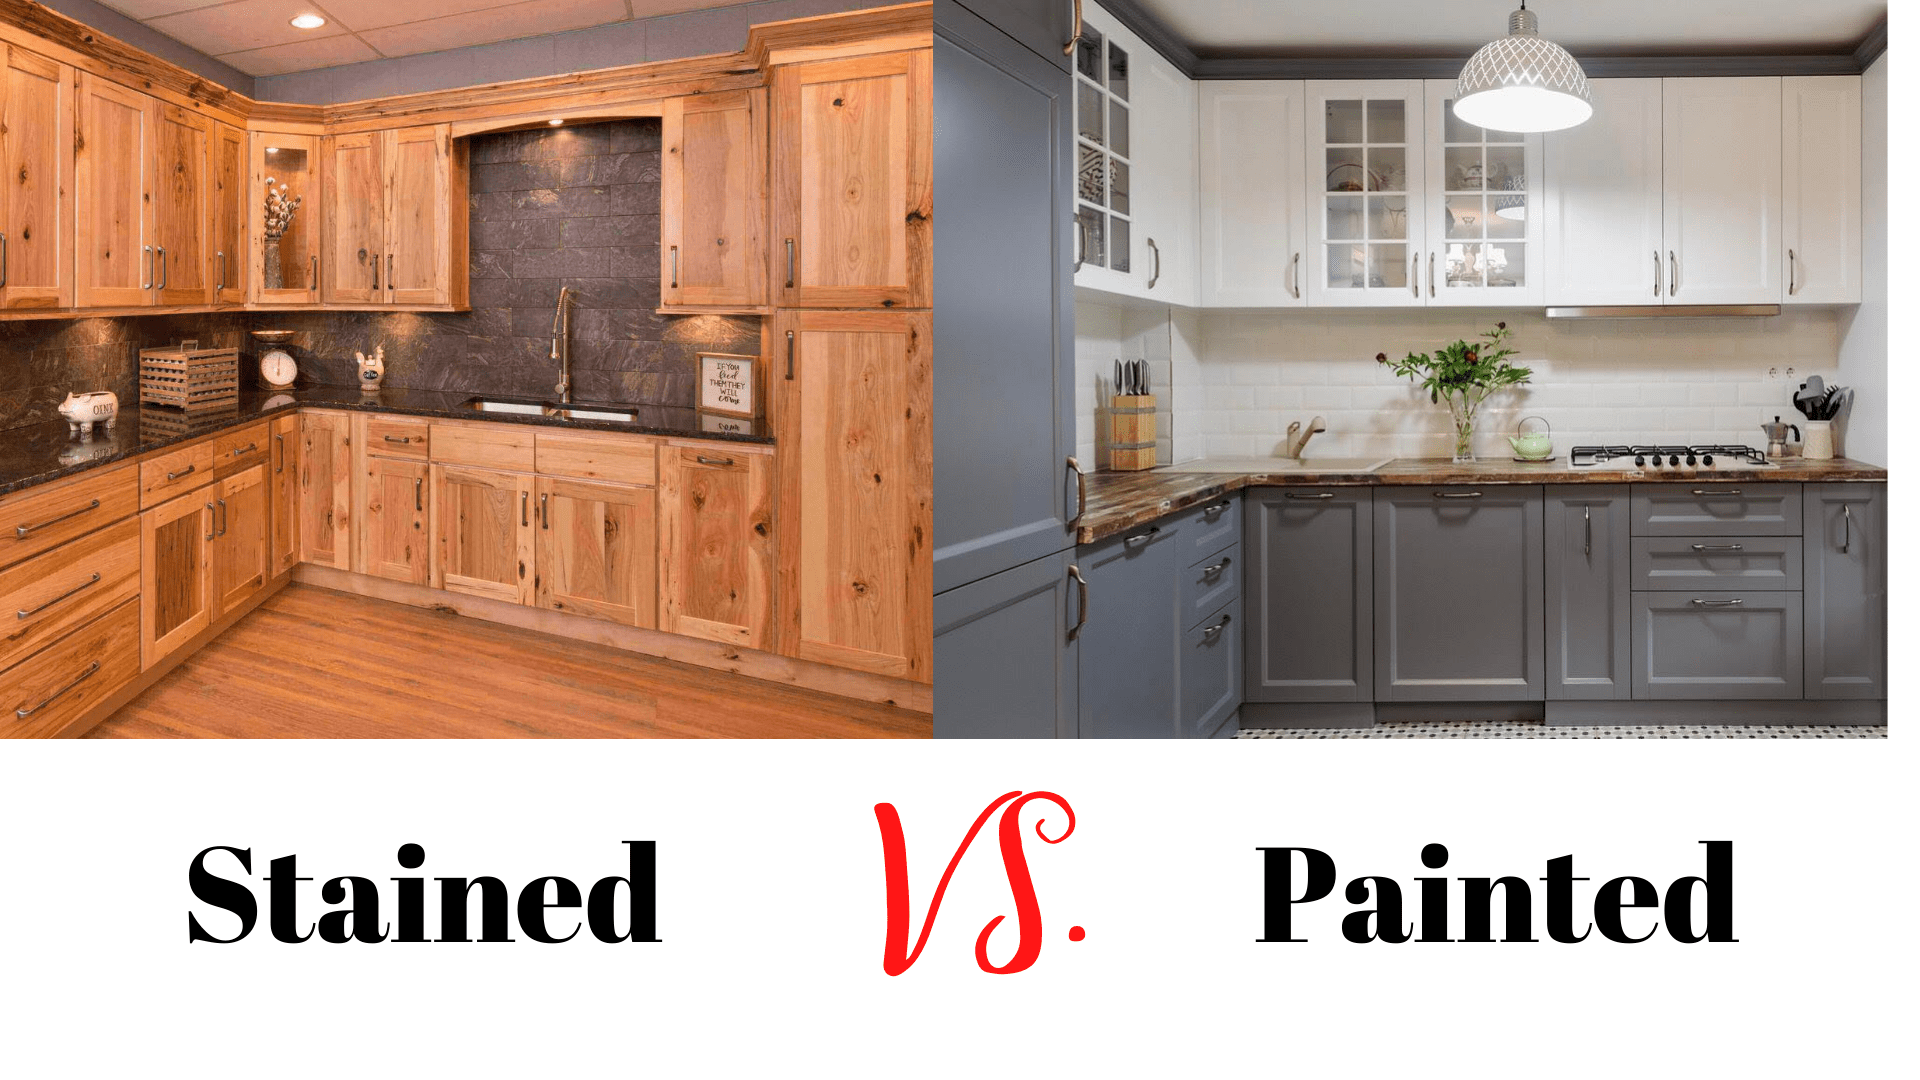
Can You Paint Stained Cabinets? – The Feasibility of Painting

Painting stained cabinets presents a significant undertaking, demanding meticulous preparation and careful execution to achieve a professional finish. The inherent porosity of stained wood and the potential for bleed-through from the stain necessitate a more involved process than painting bare wood. Success hinges on proper surface preparation and the selection of appropriate paint and primers.
Challenges of Painting Stained Wood Cabinets
Painting over stained wood cabinets presents several challenges. The stain itself can bleed through the paint, resulting in an uneven and unprofessional appearance. The existing finish may also be uneven, requiring extensive sanding to create a smooth surface for optimal paint adhesion. Furthermore, the type of stain used (oil-based vs. water-based) will influence the preparation and painting process. Oil-based stains, in particular, can be more difficult to cover completely. Finally, the sheer amount of surface area on kitchen cabinets often means the project is time-consuming.
Necessary Preparation Steps for Painting Stained Cabinets
Thorough preparation is paramount to a successful paint job. This begins with a deep clean to remove grease, dirt, and any loose particles. A degreasing agent followed by a thorough rinsing is recommended. Next, light sanding with fine-grit sandpaper (180-220 grit) is crucial to create a slightly rough surface, promoting better paint adhesion. Pay close attention to any imperfections or raised grain, sanding until smooth. After sanding, wipe down the cabinets again with a tack cloth to remove dust. Finally, applying a high-quality primer specifically designed for stained wood is essential. This primer acts as a barrier, preventing bleed-through and providing a consistent surface for the topcoat.
Comparison of Paint Types for Stained Cabinets
The choice of paint significantly impacts the final result. Oil-based and latex paints both offer advantages and disadvantages.
| Paint Type | Pros | Cons |
|---|---|---|
| Oil-Based | Excellent durability, superior adhesion, smooth finish, resists scratches and scuffs. | Strong odor, longer drying time, requires mineral spirits for cleanup, may yellow over time. |
| Latex | Low odor, quick drying time, easy cleanup with soap and water, environmentally friendly. | May not be as durable as oil-based paint, susceptible to chipping or scratching with heavy use. |
Step-by-Step Guide for Painting Stained Cabinets, Can you paint stained cabinets
This guide Artikels the process of painting stained cabinets, emphasizing precision at each stage.
1. Cleaning: A detailed image would show the thorough cleaning process, focusing on the use of a degreaser and meticulous wiping of all cabinet surfaces. Notice the removal of grease and grime from crevices and handles.
2. Sanding: The image would illustrate the careful sanding technique using fine-grit sandpaper, highlighting the even sanding across all surfaces to achieve a smooth, uniform texture. The image would contrast the before-and-after texture.
3. Priming: A detailed image would demonstrate the even application of the primer, showing a thin, consistent coat without drips or runs. The image would highlight the importance of covering all surfaces, including edges and corners, to prevent bleed-through.
4. First Coat of Paint: An image would depict the application of the first coat of paint, showcasing a smooth, even application, avoiding heavy brushstrokes or overlapping areas excessively. The image would emphasize the importance of working in sections for even coverage.
5. Second Coat of Paint: A final image would show the completed project, highlighting the smooth, even finish of the second coat of paint. The image would showcase the vibrant color and lack of imperfections. The image would also contrast the finished product with the initial stained cabinets.
Achieving a Professional Finish When Painting Stained Cabinets

Transforming stained cabinets into a fresh, painted masterpiece requires meticulous preparation and execution. A professional-looking finish hinges on careful attention to detail, the right tools, and a methodical approach. Skipping steps or using inferior materials will inevitably lead to a subpar result. This section details the key elements for achieving a flawless painted finish on your kitchen or bathroom cabinets.
Essential Tools and Materials for Cabinet Painting
Selecting the right tools and materials is paramount for a successful cabinet painting project. Using high-quality products minimizes the risk of imperfections and ensures a durable, long-lasting finish. Investing in these items upfront saves time and frustration in the long run.
- Primer: A high-quality bonding primer specifically designed for cabinets is crucial for adhesion and to block stains. Oil-based primers offer superior stain-blocking properties but require more ventilation. Water-based primers are easier to clean up but may require multiple coats.
- Paint: Semi-gloss or satin paints are recommended for cabinets due to their durability and ease of cleaning. Choose a paint formulated for kitchen and bathroom use to withstand moisture and wear. Consider low-VOC (volatile organic compound) paints for a healthier indoor environment.
- Brushes and Rollers: High-quality brushes with synthetic bristles are ideal for achieving a smooth finish, particularly in corners and edges. Use a high-density foam roller for larger surfaces to minimize brush strokes.
- Sandpaper: Various grits of sandpaper are needed for surface preparation and smoothing between coats. Start with a coarser grit (e.g., 120-grit) for removing imperfections and finish with a finer grit (e.g., 220-grit) for a smooth surface.
- Painter’s Tape: High-quality painter’s tape is essential for crisp lines and protecting areas you don’t want to paint. Apply tape carefully and firmly to prevent paint bleed-through.
- Putty Knife and Wood Filler: Use a putty knife to fill any dents or imperfections in the cabinet surfaces. Wood filler should match the color of the cabinets as closely as possible.
- Safety Equipment: Always wear a respirator mask when working with paint and primer to protect your lungs. Safety glasses should also be worn to protect your eyes from debris.
Techniques for Achieving a Smooth, Even Finish
Proper application techniques are key to achieving a professional-looking finish. These methods help minimize brush strokes and ensure an even coat of paint.
- Thorough Surface Preparation: This is the most crucial step. Clean cabinets thoroughly, removing grease and grime. Sanding is essential to create a smooth surface for better paint adhesion. Fill any holes or imperfections with wood filler and sand smooth.
- Thin Coats: Apply multiple thin coats of primer and paint rather than one thick coat. Thin coats dry faster and reduce the risk of drips and runs. Allow each coat to dry completely before applying the next.
- Consistent Technique: Maintain consistent brushstrokes and roller pressure to avoid uneven application. Work in the same direction with each coat to ensure a smooth finish.
- Proper Ventilation: Ensure adequate ventilation in the area where you’re painting to prevent the buildup of fumes and allow paint to dry properly.
- Light Sanding Between Coats: Lightly sanding between coats with fine-grit sandpaper helps to smooth out any imperfections and creates a better surface for the next coat. Wipe away dust before applying the next coat.
Handling Tricky Areas: Cabinet Doors and Intricate Details
Cabinet doors and intricate details require extra care and attention. Using the right tools and techniques ensures a professional-looking finish in these challenging areas.
- Cabinet Doors: Remove cabinet doors for easier painting. Paint the doors flat on a drop cloth or sawhorses for a more even finish. Use painter’s tape to mask off edges and hardware.
- Intricate Details: Use a small brush or detail brush for painting intricate details and corners. Take your time and apply thin, even coats to avoid drips and runs. A small foam roller can be used to paint recessed panels.
- Hardware: Remove all hardware before painting. This ensures a clean, even finish and prevents paint from accumulating on the hardware. Reattach hardware once the paint is completely dry.
Common Mistakes to Avoid and Correction Methods
Avoiding common mistakes during the cabinet painting process can save time, effort, and materials. Understanding these pitfalls and their solutions ensures a successful project.
- Insufficient Preparation: Failure to properly clean and sand the cabinets will result in poor paint adhesion and an uneven finish. Correct this by thoroughly cleaning and sanding the cabinets before applying primer.
- Uneven Coats: Applying thick coats of paint can lead to drips, runs, and an uneven finish. Correct this by applying multiple thin coats, allowing each coat to dry completely before applying the next.
- Paint Bleed: Paint bleeding under painter’s tape is caused by using low-quality tape or not applying it properly. Correct this by using high-quality painter’s tape and applying it firmly to the surface.
- Brush Strokes: Visible brush strokes indicate improper application techniques or using the wrong type of brush. Correct this by using high-quality brushes and applying thin, even coats with consistent strokes. Light sanding between coats can also help minimize brush strokes.
Alternative Solutions to Painting Stained Cabinets: Can You Paint Stained Cabinets

Updating kitchen cabinets can significantly impact a home’s aesthetic and value. While painting is a popular choice, several alternatives offer unique advantages, depending on budget and desired outcome. These options allow homeowners to refresh their cabinetry without the commitment and potential mess of a full paint job.
Refinishing, staining over existing stain, and even strategic hardware changes can achieve a dramatic transformation. The optimal approach depends on the current condition of the cabinets, the homeowner’s skill level, and the overall budget.
Cabinet Refinishing: A Comprehensive Approach
Cabinet refinishing involves stripping the existing finish—be it paint or stain—and applying a new finish. This process is more involved than simply staining over existing stain, but it yields superior results, especially for cabinets showing significant wear or damage. Refinishing allows for a complete color change and can address imperfections in the wood itself. The process typically includes sanding, cleaning, priming (if necessary), and applying multiple coats of stain or paint, followed by a protective sealant. The level of sanding required will depend on the existing finish and the desired smoothness of the new finish. For example, heavily worn cabinets might require more aggressive sanding than those in good condition. This method offers the most significant transformation, but it’s also the most time-consuming and requires a higher skill level.
Staining Over Existing Stain: A Quick Refresh
Applying a new stain over existing stain is the least invasive and quickest method. This option works best when the existing stain is in relatively good condition and the desired color change is subtle. For example, darkening existing medium oak cabinets to a darker walnut tone is achievable through this method. However, attempting a drastic color shift, such as going from dark brown to light beige, will likely result in an uneven and unprofessional finish. Thorough cleaning and light sanding are usually sufficient preparation. The key is to choose a stain compatible with the existing stain type to ensure proper adhesion and a consistent finish. Failure to do so could result in blotchiness or peeling.
Comparison of Cabinet Update Methods
The choice between painting, refinishing, and staining over existing stain depends on several factors. The table below offers a clear comparison:
| Method | Cost | Time Investment | Skill Level Required |
|---|---|---|---|
| Painting | Moderate | Moderate | Moderate |
| Refinishing | High | High | High |
| Staining Over Existing Stain | Low | Low | Low |
